PR1: The Arieiro to Pico Ruivo Traverse
How hard is the PR1 from Pico do Arieiro to Pico Ruivo?
PR1 is roughly 7km one way and takes 3 to 4 hours, with three unlit tunnels, unprotected drops and steep basalt staircases above 1,800m. It is graded difficult, not moderate, and is frequently underestimated by walkers who arrive without a torch, water or a checked forecast.
What the Vereda do Arieiro actually is
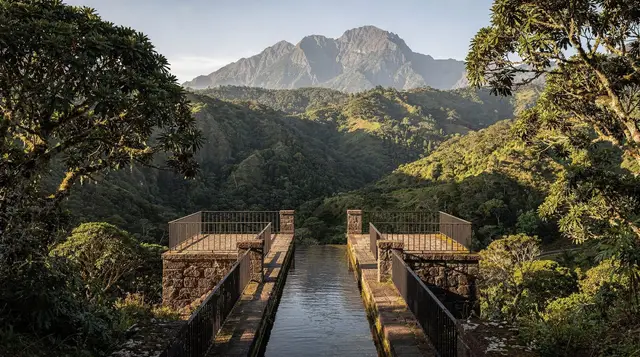
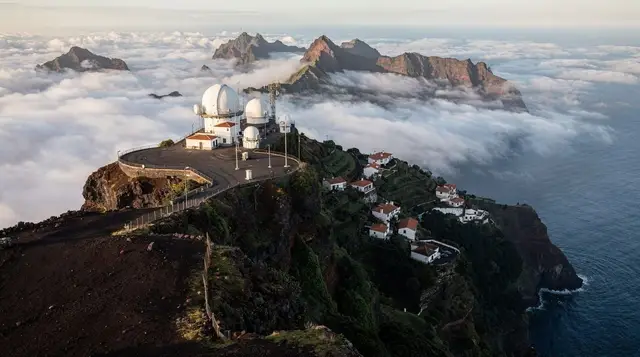
PR1 is the trail Madeira puts on every postcard and every regret. Officially named the Vereda do Arieiro, it runs for roughly 7km one way between two of the island’s three highest points: Pico do Arieiro at 1,818m, the only summit a road actually reaches, and Pico Ruivo at 1,862m, the true roof of the island, accessible only on foot. Along the way it crosses Pico das Torres at 1,851m without quite touching its summit, threads three unlit tunnels cut straight through the mountain, and climbs a run of stone staircases carved into basalt with nothing but a low wall, or sometimes nothing at all, between the path and several hundred metres of open air.
It is not the levada walking that fills most of Madeira’s brochures. There is no water channel here, no gentle gradient, no shade. This is a mountain ridge trail, and it should be planned like one.
Difficulty, honestly
Most trail signage and tour listings grade PR1 as difficult, and that grading is earned, not inflated. The distance itself, around 7km each way, is unremarkable. What makes it hard is the combination of altitude above 1,800m, a genuinely uneven and often wet surface, exposed drops with minimal protection, three sections of pitch-dark tunnel, and weather that changes faster here than almost anywhere else on the island.
Expect 3 to 4 hours to walk one way at a steady pace, closer to 4 to 5 with a group, children or frequent photo stops. This is not a trail to rush and not one to underestimate because the total distance looks modest on a map. Read mountain weather and what to wear before you commit to a date, and if tunnels or unprotected height are a concern, see levada safety, tunnels and vertigo first, since PR1’s exposure is more serious than anything found on a standard levada.
PR1 is not suitable for young children, anyone with a fear of heights that hasn’t been tested on comparable ground, or anyone planning to walk it without a torch, without water, or without checking the forecast that morning. It is the single most surestimated hike on the island precisely because its opening kilometre, near the car park, is paved and easy, which lulls people into thinking the rest matches it. It does not.
Permits and the trail fee
Since 1 August 2021, PR1 has required an online reservation and a fee, currently around 3 euros per person, per trail, per day. This is booked in advance at simplifica.madeira.gov.pt and checked at a control point near the Pico do Arieiro start. It is easy to miss this requirement entirely if you are working from an older guide or blog post, and turning up without a booking can mean being turned away at the barrier. Full detail on how the system works, and which trails it covers, is in hiking permits and trail fees.
Book for the specific date and time window you intend to walk, and build in some slack: mountain weather at 1,800m can change the plan at short notice, and Madeira’s forestry service (IFCN) closes PR1 outright after heavy rain or landslips, particularly on the more exposed ridge sections. Checking current trail status the evening before, not just the forecast, is worth the two minutes it takes.
The route, step by step
Pico do Arieiro to the first tunnel
The walk begins at the car park by Pico do Arieiro, at 1,818m, where a paved and railed section leads out past the first viewpoints. This opening stretch is the only part of PR1 that resembles an easy stroll, and it is also where most day visitors turn back. Beyond the viewpoint platforms, the surface changes: pavement gives way to stone steps, the rail disappears in places, and the trail begins to drop and climb along a narrow ridge with the crater-like valleys of the interior falling away on both sides.
The tunnels
PR1 crosses three tunnels cut directly through the mountain rock, unlit and with an uneven, sometimes dripping floor. None of them is long enough to get lost in, but all three are dark enough that a phone torch is a poor substitute for a proper head torch, which leaves both hands free for the steps and cables at the tunnel mouths. Walking these without a light source is one of the most common regrets reported by first-timers, and it is entirely avoidable with a two-pound torch carried in a pocket.
Pico das Torres and the central ridge
Between the tunnels, the trail skirts the flank of Pico das Torres, at 1,851m the second-highest point on the traverse, without a marked spur to its actual summit. This central section is the most exposed part of PR1: a narrow ridge path with staircases cut into basalt, iron handrails in the steepest sections, and long views down both the north and south sides of the island simultaneously on a clear day. It is also where cloud rolls in fastest, since this ridge sits directly on the boundary where the wetter north and drier south air masses meet.
The final climb to Pico Ruivo
After the third tunnel, the trail begins its final ascent towards Pico Ruivo. This last climb is short but steep, arriving at Madeira’s highest point and a small refuge hut where many walkers stop for food before either retracing their steps or continuing down the shorter route to Achada do Teixeira. That alternative descent, roughly 2.8km rather than 7km, is covered separately in the short route to Pico Ruivo and is worth knowing about even if you do not plan to use it, since it is the standard way to shorten a return trip if weather or energy runs short.
Trail segments at a glance
| Segment | Approximate distance | What to expect |
|---|---|---|
| Arieiro car park to first viewpoints | 0.5km | Paved, railed, easy |
| Viewpoints to first tunnel | 1km | Stone steps, ridge exposure begins |
| Three tunnels (combined) | 0.3km | Unlit, uneven floor, head torch needed |
| Pico das Torres flank | 2km | Narrow ridge, staircases, most exposed section |
| Final climb to Pico Ruivo | 1.5km | Steep, short, arrives at the refuge hut |
| Pico Ruivo to Achada do Teixeira (optional) | 2.8km | Shorter alternative descent, different car park |
What to carry
A head torch is not optional; treat it as trail equipment rather than a nice-to-have. Beyond that: at least a litre of water per person, since there is no source along the ridge, layers for a temperature swing that can exceed 15°C between the exposed summit and the sheltered valleys, sturdy footwear with real grip rather than trainers, and a fully charged phone kept for emergencies rather than photography. Given that Pico do Arieiro sits above 1,800m, mornings can sit close to freezing even when Funchal is comfortably mild; see what to pack for Madeira for a fuller list geared to the island’s mountain-to-coast temperature range.
Weather and when to go
Cloud on the central mountains builds through the morning on most days, which is one reason the sunrise departures at Pico do Arieiro are popular for photography rather than for PR1 itself; this guide deliberately does not cover that separate sunrise experience, which has its own dedicated guide. For the full traverse, an early but not pre-dawn start, aiming to be walking by mid-morning, tends to give the best balance of light and visibility before afternoon cloud settles on the ridge.
Never plan PR1 around a single island-wide forecast. Funchal on the coast can read 24°C while the summits sit near freezing and wrapped in cloud, and the two conditions exist on the same day without contradiction. Check conditions specifically for the Arieiro-Ruivo massif, not the general Funchal forecast, and be ready to postpone if the mountain forecast looks poor even when the coastal one looks fine.
Getting there and back
PR1 is a linear trail between two different car parks, not a loop, which is the main logistical wrinkle. Most walkers either arrange a taxi to collect them at Achada do Teixeira (if continuing past Pico Ruivo) or at the Pico Ruivo car park itself, or join an organised hike that handles transfers at both ends. Self-driving is possible if you can coordinate a second vehicle or a pickup, though a rental car alone will leave you needing to walk back the way you came unless transport is pre-arranged.
For walkers who would rather not manage permits, tunnels and transfers solo, a guided option removes most of the planning:
a guided walk over the Arieiro staircases to the hidden viewpoints along this ridge, or a longer guided combination linking Santana with the PR1 and PR12 trails around Ruivo and Arieiro for those wanting more of the surrounding massif in one day.
If PR1’s altitude, exposure or tunnels are more than you want to take on but you would still like a taste of Madeira’s high mountains, Ribeiro Frio and the short walk to the Balcões viewpoint offer a far gentler introduction to the same massif, or consider a full-day guided hike from Ribeiro Frio towards Portela as a lower-altitude alternative with a similar sense of scale.
Planning your trip around PR1
If PR1 is the centrepiece of a longer stay, it fits naturally into a dedicated hiking itinerary such as Madeira’s hiking week, scheduled with a spare day either side in case of a weather postponement. It’s also worth reading through Madeira travel mistakes to avoid before you go, since underestimating mountain trails is one of the more common and avoidable ones. For those weighing whether to walk with a guide or navigate the permit system and transfers independently, both routes are covered honestly across the site’s planning guides, and either is a reasonable choice once the trail fee, the tunnels and the transfer logistics are accounted for.
PR1 Arieiro to Ruivo: frequently asked questions
Is PR1 the same trail as the Pico do Arieiro sunrise walk?
They share the same starting point but are different experiences. The sunrise walk is usually a short out-and-back near the viewpoints close to the car park at dawn, while PR1 is the full 7km traverse over to Pico Ruivo, done in daylight for safety and view.
Do I need to book anything before walking PR1?
Yes. Since August 2021, official PR trails including PR1 require an online reservation and a small per-person fee, checked at a control point near the start. Booking a slot the day or two before is normal practice in high season.
Can I do PR1 in trainers?
It is not recommended. The path includes wet, uneven basalt steps, tunnel floors and exposed sections without a rail, and proper grip and ankle support matter far more here than on a flat levada.
How long does the PR1 traverse actually take?
Most fit, unencumbered walkers take 3 to 4 hours one way, plus stops for photographs. Add time if you are walking with children, carrying heavy packs, or continuing past Pico Ruivo to Achada do Teixeira.
Is PR1 one way or a loop?
It is a linear, point-to-point trail between two different car parks, so most people either arrange a taxi transfer between the two ends or join a tour that handles the logistics.
What happens if the trail is closed?
Madeira’s forestry service closes PR trails after heavy rain, landslips or high wind, and PR1’s exposed ridge sections close first. Always check current status before driving up, since a closed trail cannot be talked past at the control point.
Are the tunnels on PR1 dangerous?
They are not technically difficult but they are unlit, uneven underfoot and disorientating without a torch. A head torch, not a phone light, is the standard recommendation from anyone who has walked them without one and regretted it.
tours.mountain-peaks
Verified deep-linked GetYourGuide tours. Book through these links and we earn a small commission at no cost to you.
GetYourGuide does not provide a product photo for this activity — the image shows the meeting point, photographed by us.